
- Create a JFrame then named Splitpane.
- Put JSplitpane from Palette

- Set properties, orientation=VERTICAL_SPLIT,
dividerLocation=150


- Put another JSplitpane
from Palette on top component.

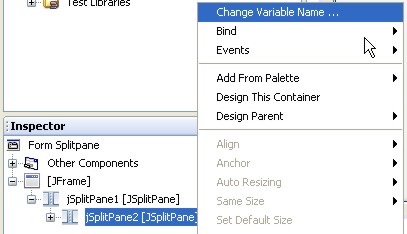
- On Inspector, right-click jSplitPane2 (new JSplitpane) then
renamed "splTop".
- Put another JSplitpane from Palette on bottom component.

- On Inspector, right-click the new JSplitpane then renamed "splBottom".

- On Inspector, click splTop,
change property dividerLocation=150


- Run program

HOLDING THE BOTTOM-SIZE WHEN RESIZING THE JFRAME
- On Inspector, click the jSplitpane1
that we want to hold the bottom-size

- Setting the property, resizeWeight=1.0

- On Inspector, click splBottom

- Setting the properties, maximumSize=0, minimumSize=0, and
preferredSize=0

HOLDING THE RIGHT-SIZE WHEN RESIZING THE JFRAME
- From Palette click JPanel and put in on the right of splTop.

- On Inspector, click splTop,
then set property, resizeWeight=1.0


- On Inspector, click jPanel1

- Setting the jPanel1's properties, maximumSize=0,
minimumSize=0, and preferredSize=0

- Just for tag, from Palette click JTabbedPane, and put it on the
right of splBottom.


- From Palette, click JPanel and put it on JTabbedPane.

- From Palette, click JButton and put it on the new JPanel.
